Thursday, January 31, 2013

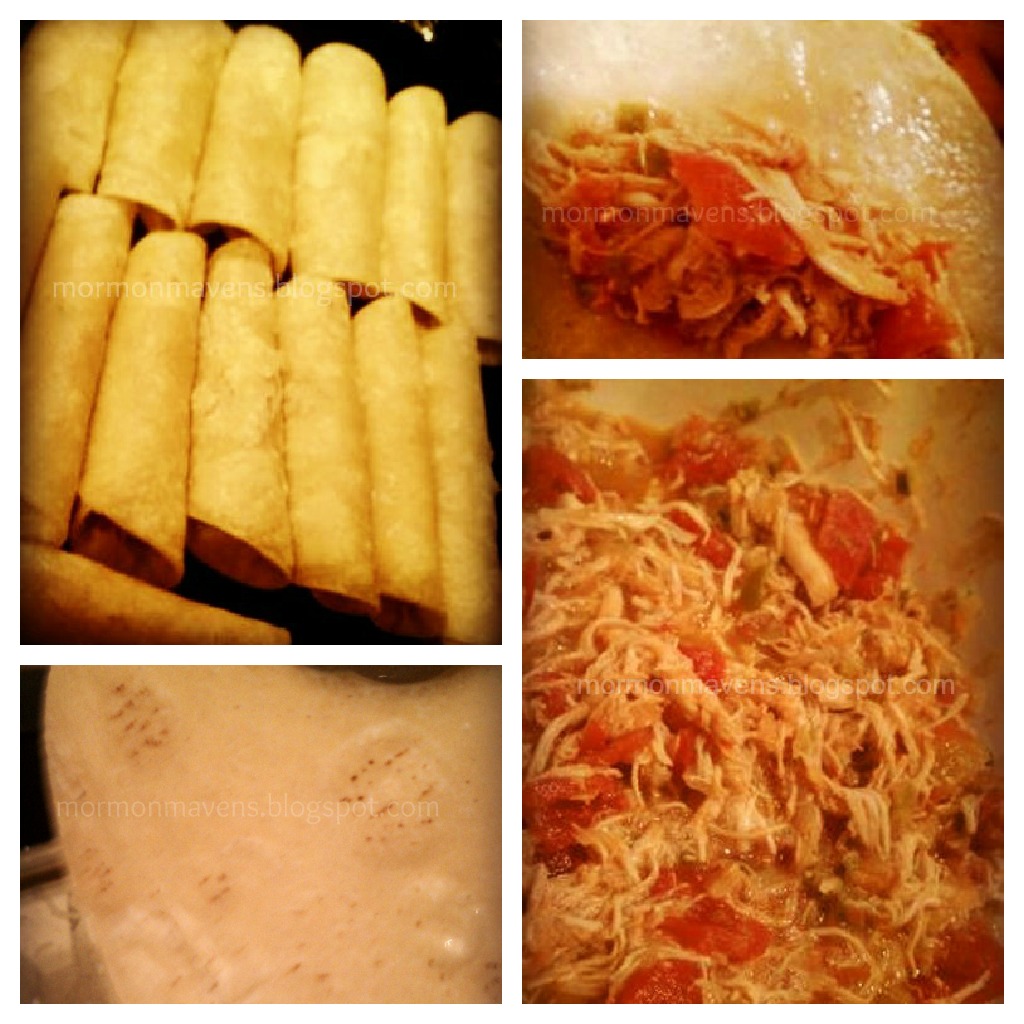
Chicken Enchiladas


One of my favorite recipes from College Days came from my roommate Robin Parks. She was from southern California and provided several yummy recipes.  There is another one for hamburgers with fried eggs and cranberry sauce on it.  Seriously good, no kidding!  These enchiladas are a little time-consuming and really end up looking like a casserole, but they are so-o-o good. These are a family favorite.


Ingredients:
1 chopped onion
2 tablespoons vegetable oil, plus more for frying tortillas
1 crushed garlic clove
2 cups stewed tomatoes
2 -3 whole chopped green chilies, or 2 small cans
1 doz. corn tortillas
2 cups cooked, chopped chicken
6 bouillon  cubes, or 6 teaspoons granules
3 cups hot 1/2 & 1/2
1/2 lb. Monterrey Jack cheese, grated

1.  Saute onion in oil til soft .  Add garlic, tomatoes, chilies and chicken.  Season with salt and simmer 10 minutes.

2.  Fry tortillas in 1" of hot oil.  Do not let them crisp.  Place on paper towels to drain excess oil.

3.  Dissolve bouillon cubes in hot 1/2 & 1/2.  Dip each tortilla in this, fill with about 1/4 cup chicken filling and roll up.

4.  Arrange rolls in a 9 x 13 baking dish.  Pour remaining 1/2 & 1/2 mixture over them.  Top with grated  Jack cheese.

5.  Bake at 350 degrees for 30 minutes.


Source:  Robin Parks, Fullerton CA


Tuesday, January 29, 2013

Oreo Cheesecake Cookies


Ingredients:

1/2 c. unsalted butter, room temperature
3 oz. cream cheese, room temperature
1 c. sugar
1 t. vanilla
1 c. flour
1/2 c. mini chocolate chips
1/2 c. white chocolate chips
1 c. Oreos, crushed

Directions:


1.  Preheat oven to 375 degrees F.  Line a baking sheet with parchment paper and set aside.

2.  In a mixing bowl, cream together the butter and cream cheese on medium speed until smooth and well-combined.

3.  Add the sugar and vanilla and mix until the ingredients are well-combined.  Add the flour and mix on low until the flour is incorporated.   Stir in the mini chocolate chips and white chocolate chops with a rubber spatula.

4.  Place the Oreo cookie crumbs in a small bowl.  Scoop the cookies into about 1 1/2 to 2 inch balls and then roll in the cookie crumbs.  Place the cookie balls on the baking sheet.  Bake for 12 to 15 minutes or until edges are golden and the tops are slightly puffed.

5.  Cool on the pan for 2 minutes before transferring to a wire rack to cool completely.  Store in airtight container.

Source:  Brown Eyed Baker

Monday, January 28, 2013

Puff Pastry Chicken


I made this for the first time tonight, and my family LOVED it! It was such an easy recipe too! I will definitely be making this again! YUM!

I've never cooked with puff pastry before, and I really liked it! So flaky and delicious!

Puff Pastry Chicken

Ingredients:
4 chicken breasts
frozen puff pastry sheets, thawed (I bought 1 box of Philo dough, and it was enough) 
4 oz cream cheese, softened
3-4 slices of bacon, cooked and crumbled
fresh parsley, a few sprigs, chopped
1 green onion, chopped (can use dried onions instead)
1 egg, put in bowl and whisked
salt and pepper to taste

Instructions:
1. Mix together cream cheese, bacon, parsley, and onion. This is your filling.

2. Cut a deep slit into each chicken breast, and add the filling. 

*Once I got the chicken breasts slit and stuffed with the filling, I felt they were way too large, and I cut them each in half. Then I wrapped them with the dough. I am so glad I did this! They were the perfect serving size for us. A whole breast would have been way too big!

3. Generously salt and pepper the chicken.


4. If you get two large sheets of puff pastry like I did, you will need to cut them into pieces the right size to wrap around each piece of chicken. This is slightly tricky, but I made it work. 

5. Place the chicken onto the dough, filling side down. Brush some egg around the edge of the dough -  this is used to help seal the dough together. Fold the dough around the chicken and place on greased baking sheet, with the ends of the dough down.

6. Brush top with egg.

7. Bake at 400 degrees for 30-35 minutes, or until the chicken is done. 


These were truly delicious! I hope you enjoy them like we did!

Source: adapted from kayotickitchen


Friday, January 25, 2013

Baked Chicken Taquitos

The Superbowl is coming! I made these taquitos for New Years Eve, and boy were they good. I'm pretty sure they'll show up on our table during the Superbowl as well.


Baked Chicken Taquitos 

Ingredients:
1/3 cup (3 oz) cream cheese, room temperature
1/4 cup green salsa
1 Tablespoon fresh lime juice
1/2 teaspoon cumin
1 teaspoon chili powder
1/2 teaspoon onion powder
1/4 teaspoon garlic powder
3 Tablespoons cilantro, chopped
2 Tablespoons green onions, sliced
2 cups shredded cooked chicken
1 cup grated pepper jack cheese
about 12 small flour tortillas
kosher salt
cooking spray

Instructions:
1. Preheat the oven to 425 and line your baking sheet with foil. Spray the foil with cooking spray.
2. In a bowl, combine the first 7 ingredients. Stir until well incorporated. Add the following 4 ingredients.
3. Now, it's time to assemble them. You'll spoon about 3 Tbs. of the chicken mixture into the lower part of the tortilla. Do not spread to too close to either side. Now, roll it up as tight as you can. As you roll, the mixture will spread closer to either side.
4. Place seam side down onto your spayed, foil lined, baking sheet.
5. Spray the tops of the taquitos with cooking spray and sprinkle salt over the top.
6. Cook in the preheated oven for 15-20 minutes.

* You could easily make this with corn tortillas to make this gluten free!

Source: Our Best Bites

Wednesday, January 23, 2013

Maple, Cinnamon, and Orange Creme Brulee

I had leftover heavy cream so it was the perfect excuse to experiment and try my hand at creme brulee.  Making creme brulee was easier than I thought.  This recipe uses pure maple syrup instead of refined sugar as the sweetener. 

Ingredients:
2 Cups Heavy Cream
1 Egg plus
3 Egg Yolks
7 Tablespoons Pure Maple Syrup
1 Cinnamon Stick
Zest of 1 Orange
1-2 Tablespoons of Orange Juice
1/2 Teaspoon Vanilla Extract
Sprinkle of Sugar for the Topping
4 (7 ounce) brulee ramekins

Directions:
Pre-heat oven to 325 degrees.

In a saucepan combine the heavy cream, 3 T maple syrup, cinnamon stick, orange zest, orange juice.  Whisk the ingredients together and bring to a boil in the saucepan.  After the cream has come to a boil, remove from the heat and let it cool.

In a mixing bowl, whisk together the egg and egg yolks, remaining maple syrup, and vanilla extract.  Slowly whisk the cream into the egg mixture until the two are well-combined.

Set the ramekins in a glass baking dish.  Add hot water so it goes half way up the ramekins.  This will prevent the eggs from cooking too fast.  Fill the ramekins with mixture.  Cook for 40-50 minutes making sure the custard is set and slightly jiggly but not liquid.  Let the creme brulee cool for an hour before serving.


The last step is to sprinkle sugar on the top of each custard.  You can either burn the sugar with a blow torch or broil it in the oven.

Serve and Enjoy!

Source: Cinnamon & Orange Recipe and Maple Syrup Recipe

Tuesday, January 22, 2013

Sugary Peanut Butter Kisses

 
These are so yummy.  The kids enjoyed mixing the colors into the sugar, and then rolling the cookies in the different colored sugars.  So, this is a very kid friendly recipe and so good to eat!
 
Coloring sugar:
1-2 drops Wilton Gel Food Colors
1/2 c - 3/4 c Granulated sugar
 
Pour sugar into a ziploc bag and squeeze one drop of gel color into the sugar. Seal the bag and start squishing the color into the sugar unto all the sugar is colored.  You can darken the color  by adding more drops of the gel. You can lighten the color by adding more sugar.
 
 
Cookie Ingredients:
1/2 c. sugar
1/2 c. firmly packed brown sugar
1/2 c. real butter, softened
1/2 c. peanut butter
2 TBSP. milk
1 tsp. vanilla
1 egg
1- 3/4 c. self-rising flour
Hershey kisses, about 30 or more pieces, with the foil off
 
Preheat your oven to 375%. Cream together the white sugar, brown sugar and butter. Really give a few minutes to get nice and creamy. Scrape down the sides of your bowl and add the following peanut butter, milk, vanilla and egg. Mix well and scrape down the sides of your bowl. Whisk the flour and then scoop up the right amount needed.  Slowly add in the flour and continue to scrape down the sides of the mixing bowl.
 
Pour colored sugars onto paper plates. With a cookie scoop drop 1" balls of the dough into the different colors of sugar and roll around. Place the cookies about 2" apart on the cookie pan. Bake for 10 minutes for a soft chewy cookie, and 12 minutes for crunchy cookie.  (The cookie will flatten a bit as it bakes.)
 
Take cookies out of the oven and immediately press the hershey kiss into the cookie slightly! Move cookies to a rack to cool.  It takes a while for them to cool down because the hershey kiss melts a bit and then solidifies again.  So, give them time.  Then enjoy!


Monday, January 21, 2013

Cloud Bread

Though I found this recipe intriguing while browsing Pinterest, I never really felt a need to give it a try.  I mean, why should I try to make a nearly carb-less bread?  I'm perfectly happy with the carb-laden kind!  Well, it wasn't long before I found out that I'm prediabetic and need to drop some weight and get my carb intake under control.  At present time, I'm still working on it.

I won't say this recipe fulfilled any deep bread cravings, but it was nice to have SOMETHING to make a breakfast sandwich out of.  I've also toasted it and used it as a sort of tostada.  If you decide to give it a try, make sure to follow the directions very closely.

Ingredients:
3 eggs (separated)
3 Tbsp. cream cheese
1/4 tsp. cream of tartar
2 tsp. stevia

1.  Preheat the oven to 300 degrees.  Separate the whites of the eggs into a mixer bowl and the yolks into a small mixing bowl.
2.  Into the YOLKS, whisk in the stevia until smooth and well-combined.  Into the WHITES, add the cream of tartar and mix until you get stiff peaks.
3.  Add a little of the whites mixture (maybe 1/4 c.) into the yolks mixture and stir together until combined.  This will lighten up the yolks mixture a bit before folding it into the whites.  Carefully fold in the yolks mixture into the egg whites.  Fold only!  Do not stir or whisk as this will make the whites "deflate".  Fold gently until the whites and yolks are combined.
4.  Place a sheet of parchment or waxed paper onto each of two cookie sheets.  With a large spoon or large cookie scoop, dollop the mixture in four or five piles on the paper/cookie sheet.  Use the back of the spoon to make these dollops into nice even circles.  You want these to be at least 1/2-3/4" thick.
5.  Bake on the middle rack of the oven for about 30 minutes (you really have to watch these, only bake until they are golden).  Since I had two large cookie sheets I switched their positions halfway through and just baked each sheet until the "bread" was a nice golden color.
6.  Allow to cool COMPLETELY on a wire rack (I just transferred the papers straight onto a wire rack).  Once cool, they will become soft but just out of the oven they are a bit crispy.  Store in a ziploc bag.

Makes 8 to 10 pieces

Notes:

  • Another recipe that I saw said you could use the same amount of cottage cheese in place of the cream cheese.  Haven't tried that yet.
  • The recipe I used called for 1 packet of stevia, but I only had it in a large bag.  A web search informed me that 1 packet = 2 tsp.
  • The recipe I used did not suggest lightening up the yolks mixture with the whites, but I've watched enough cooking shows to know that this is a great tip and helps with the folding process (plus, it's always worked better for me personally).
  • These are fairly fragile.  They stood up okay to an egg/sausage load for breakfast, but just barely and only because I sort of cradled the sandwich carefully.  Toasting them makes them crispy but may also make them taste more egg-y.
  • One piece is about 38 calories and about .25g of carbs, by my calculations.
  • I've learned that this recipe is also known as Oopsies.
Source:  all over the internet, but I used the recipe from Mom, What's for Dinner?